If your WiFi router’s network coverage is spotty or out of range, you may face trouble accessing the internet and completing online tasks. This can hamper your productivity significantly. Fortunately, Netgear WiFi Extender Setups can help rebuild WiFi coverage in corners and far-off areas around your location. If you have a new Nighthawk model, learning how to complete the Netgear Nighthawk extender setup process will come handy. This blog will walk you through complete information on how to setup Netgear nighthawk extender using the web-based device management wizard.
What Will You Need for the Setup?
Before you set things up, you’ll need to ensure you have all the things like:
- Your Netgear Nighthawk Extender Device
- Supporting Network/LAN Cables (preferably CAT5E) for wired connections
- The Main Router’s WiFi network credentials
- The Netgear Nighthawk App downloaded on your smartphone(optional)
And that’s it. If you have these three critical things, you can proceed with the Netgear wifi extender setup comfortably.
Ways You can Setup Netgear Extender
There are three main ways you can set up your Netgear Nighthawk Extender. These are:
- WPS Setup Method
- Using the Web-based Setup Wizard
- Using the Netgear Nighthawk App
WPS Setup Method
In order to complete Netgear Nighthawk Setup extender details must be readily available. By details, we mean the location of the WPS button and different LEDs and ports. Knowing all this information helps ensure that you can complete the setup process easily. Now, to proceed with the WPS method, you’ll need to know the location of the WPS Setup button on your device.
The WPS or Wi-Fi Protected Setup is one of the easiest ways to set up your range extender devices, in fact any networking devices. It lets you connect the devices with just a press of a button. However, not all devices support the WPS feature. If your extender or the router you’ll connect to does not have a WPS button, you’ll need to follow the alternate methods for setup and configuration.
To proceed with the setup process using the WPS button, here are some steps you can follow:
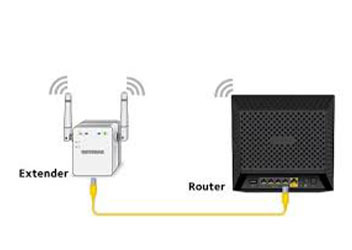
- Plug in your extender near your router and set it to Extender Mode.
- Once you see a green/blue light on your device, press the WPS button on the extender device. When you do so, you’ll see the WPS LED blink.
- Now, go to the main router you want your extender to connect to and press the WPS button there as well.
- The router will now connect to the extender device using a wireless WiFi based network.
- Once connected, the LEDs on the devices will turn solid. This means that the devices have connected to each other.
If you have a dual-band WiFi extender, you’ll need to repeat the connection process for the 5GHz band as well. Once done, you can now keep or relocate the extender device to a location where you need to access the internet. However, always ensure that this location is within the maximum network reach of the main router, so it can successfully extend the signals further.
Netgear Nighthawk extender login setup using the mywifiext portal
Setting up your Netgear Nighthawk extender is possible using the mywifiext setup wizard as well. This method is usually for older extender models which don’t have wireless network transmission capabilities. To complete the same, you’ll need the device’s admin credentials. You can find the same on the device’s label itself, or in the user guide that arrives with it. Once you have these details, you can proceed with the setup process by following the steps below:
- Plug in the Netgear extender to a power outlet. The power LED should light up once connected. If it doesn’t, press the Power On/Off button.
- Once connected, connect your computer to the extender device using an ethernet cable. The LAN LED on the extender will light up.
- Now, go to the computer and in the Available Networks section, connect to the extender network.
Netgear Nighthawk Extender Login
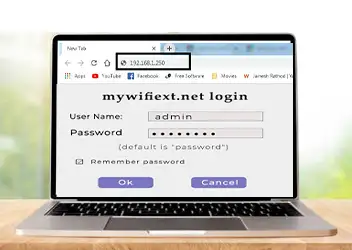
- Now, open a web browser and type the default web address mywifiext.net in the URL bar. You can also use the default IP address 192.168.1.250 instead of the web address to access the Netgear extender login page.
- Once you see the Netgear wifi extender login page appear on the screen, type in the default username and password details in their respective fields. Click on the Login button now.
Note: The default Netgear WiFi Extender login username and password details can be found on the sticker on the device. You can also look them up in the user manual that arrives with the box.
- The login wizard will now validate the credentials you have entered and then log you in to the setup wizard. If the Netgear WiFi extender username and password details which you entered don’t work, try ‘admin’ in both the fields and try to log in again.
- Once you have logged in through the www mywifiext net login wizard, you can start configuring the network and device settings.
How to setup Netgear Nighthawk Extender?
- Once you are logged in, you will see the Welcome screen of the Netgear WiFi extender setup wizard. Click on the New Extender Setup option.
- Now, configure the device’s admin credentials. These are the admin details you will be using to log in to the setup wizard in the future. If you want, you can change these details to whatever you like. Once done, click on the Next button.
- The extender will now start looking for the host networks to connect to. Once you see a list of networks, select the one that belongs to your main router and then click on the Connect button.
- Now, type in the main router’s network password and click on Connect. The setup wizard will validate the details you have entered and then connect the devices together.
- Once successfully connected, you can configure the Netgear extender’s network details as well. Specify the network SSID and password you want for the network. Once done, click on the Save button.
- The extender will save the settings you have configured. This process might take a few minutes. Once the process is complete, you can connect your devices to the extender’s network and start using the internet at locations you want connectivity at.
These steps complete the Netgear Nighthawk extender setup process using the mywifiext setup wizard.
Setup using the Netgear Nighthawk App
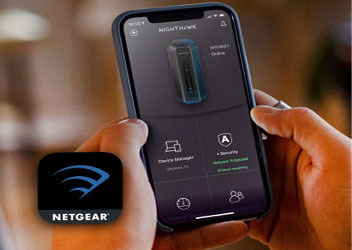
The Netgear WiFi extender app can help with the device configuration as well. However, you’ll need to ensure that your particular model supports the setup using the app. Also, you’ll need to download and install the latest version of the app on your smartphone. The Netgear nighthawk app is readily available on Google Play Store and Apple App Store. So, if you haven’t downloaded it yet, you can do it easily.
To set up your Netgear extender using the App based method, follow these steps:
- Open the App on your smartphone and tap on the “Set up a new device”. Now, select the range extender from the next menu.
- The app may ask you to scan the router networks and connect to them by asking for their network passwords. When prompted, type in the same and repeat the process if there’s a dual-band device involved.
- Follow the on-screen instruction on the app and complete the Netgear Nighthawk extender setup process.
- Once the basic configuration is complete, check the signal strength, rename the network SSID and enable the Smart Roaming feature if you want.
Setting things up using the Netgear WiFi extender app is among the most convenient ways to connect your dual-band and tri-band devices. Once the setup process is complete, you can connect your devices to the new extender network and start accessing seamless internet easily.
FAQs
Can I use two Netgear WiFi extenders in a house?
If both of your extenders can connect to the router and not to each other, you can, yes! You will need to follow the Netgear WiFi extender setup process individually for both these devices.
Why does my extender show connected but no internet?
Password mismatch or IP conflicts may arise prompting you to re-enter the device network credentials in the correct fashion. In such cases, you will need to forget and reconnect to the host network, which typically resolves the issue. Once you have changed the password, ensure that you reconnect all the devices to the internet to be able to use the internet again.
Do extenders reduce speed?
Yes, using a range extender does reduce the network speed, but only slightly. About 10-20% of the network speeds will experience a drop. If you have a dual-band device, or have connected the devices using wired connections, you can expect 90% of the original network speeds to be retained.
How often should I reboot my extender?
You can reboot your extender every 2-4 weeks for peak performance. This helps clear the cache and temporary files that might impact device performance.
The Final Word
Accessing the Netgear Nighthawk WiFi extender login wizard to go to the mywifiext setup wizard can help configure the device settings easily. You can use the Netgear Nighthawk extender login password to access the setup wizard and complete the setup process with ease. If you face issues with Netgear Nighthawk Mesh extender login, like Netgear Nighthawk extender login not working or more, you can always reach out to the team at our end.